This handbook page covers a common tasks related to site creation, site management, and other technical tasks.
- How to create email accounts for partner sites
- How to add a WooCommerce plan to WordPress.com
- Add an existing Google Analytics ID to a new site
- How to delete a site in Pressable and DeployHQ
- How to retrieve assets accidentally permanently deleted
- How to duplicate a WordPress.com Business Site
- Tools to help purge DNS cache for faster Internet propagation
How to create email accounts for partner sites
Sometimes partners will request email accounts that use their domain name. We should recommend the options available on the same hosting platform as their site. Some helpful links:
- Pressable Professional Email (Titan)
- WordPress.com Professional Email (Titan)
- WordPress.com Google Workspace
How to add a WooCommerce plan to WordPress.com
Step 1: Add the a8cteam51 user to the site.
Adding the a8cteam51 user to a WordPress.com site allows the Special Projects Team to log in and upgrade the site to an eCommerce plan using credits. We can easily add a user to a WordPress.com site via the Network Admin tool.
- Using the ███████████████ search for the WordPress.com site.
- On the results screen click the Edit link which will load the Edit Site Page.
- Click on the Users tab, and add the user
a8cteam51as an admin.
Step 2: Add an eCommerce plan to the site
Next, via the a8cteam51 user account, upgrade the site to an eCommerce plan. This will install WooCommerce on the site and make it an Atomic site.
Note: we typically use the a8cteam51 user account and not the partner’s user account for upgrades. Doing so allows us to set upgrade expiration dates years in future and exempts upgrades made by the a8cteam51 account from automated scripts that flag sites with outrageously long expiration dates.
- Using the a8cteam51 account, open a ███████████████, and go to the WordPress.com site’s wp-admin.
- Go to Upgrade → Plans and choose the eCommerce plan.
- Using the account credits proceed with the upgrade.
Step 3: Update the expiration date of the plan
- Go to the ███████████████.
- In the User Search section, enter username
a8cteam51and click the Search button. - The search results page will return a page with a search bar at the top. Search for the site you need in this box.
███████████████
- Upgrade the expiration date for WordPress.com eCommerce plan to 100 years in the future. The point of doing this is so the partner is never is charged.
███████████████
Add an existing Google Analytics ID to a new site
For partners with GA tracking on their existing websites, follow the directions outlined below to add GA to their new site.
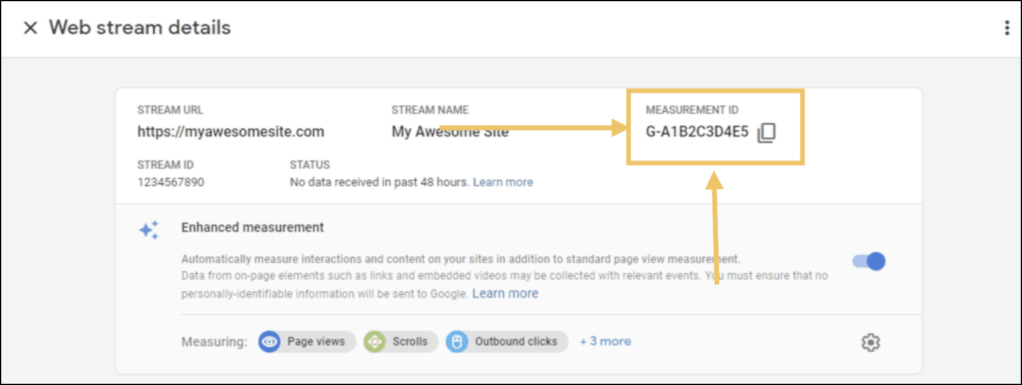
A Measurement ID (not the Tracking ID) is required to set up Google Analytics via Jetpack. The partner (or you) will need to create a Property for the website in their existing Google Analytics account and provide the Measurement ID which looks something like G-A1B2C3D4E5.
Steps 1–5 can be shared with the partner via the Zendesk macro 51::Message Templates::Google Analytics - Measurement ID.
- Click Admin in the Google Analytics account and click the
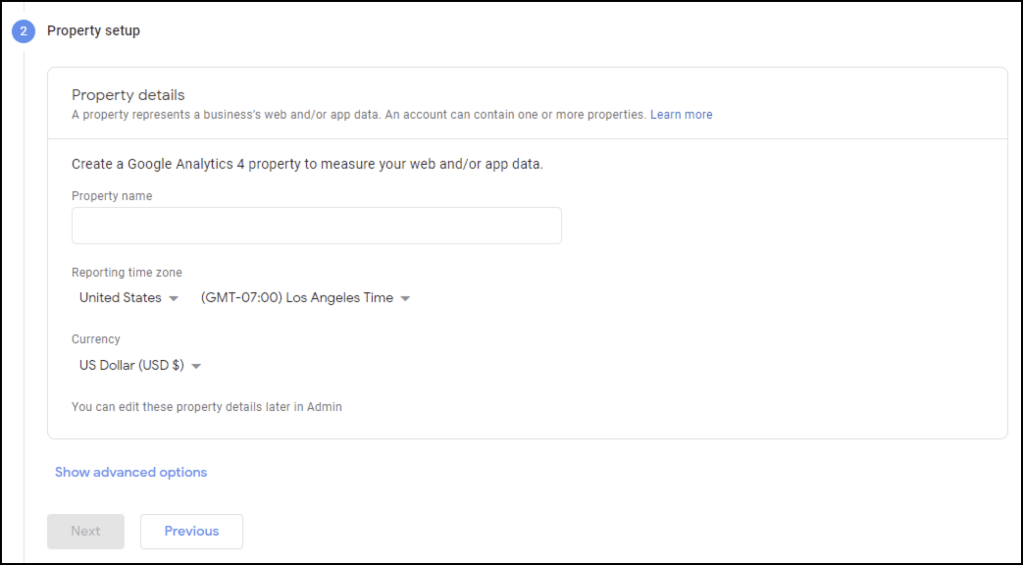
+ Create Propertybutton to create a new analytics profile. You will then be taken to the Property Setup screen. - On the Property Setup screen, fill in the following details:
- Property Name: Enter a name for your property, such as your site title.
- Reporting Time Zone: Choose the timezone you want the reporting of your website to be in.
- Currency: Choose the currency of the location you normally operate in.
- On the next screen, fill in your business information and click Create.

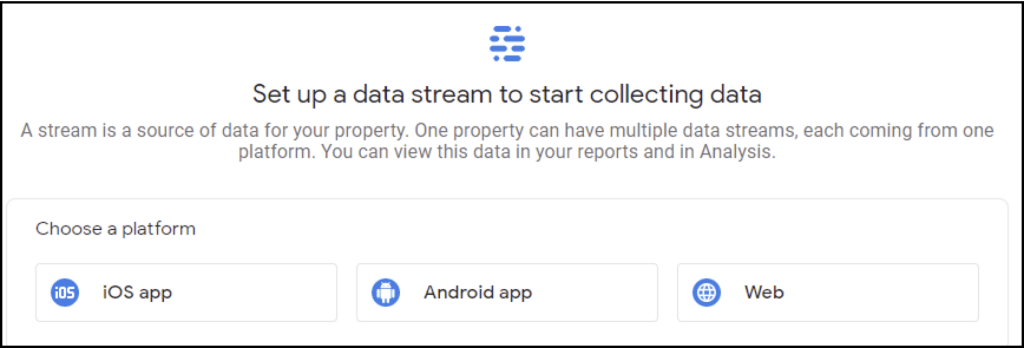
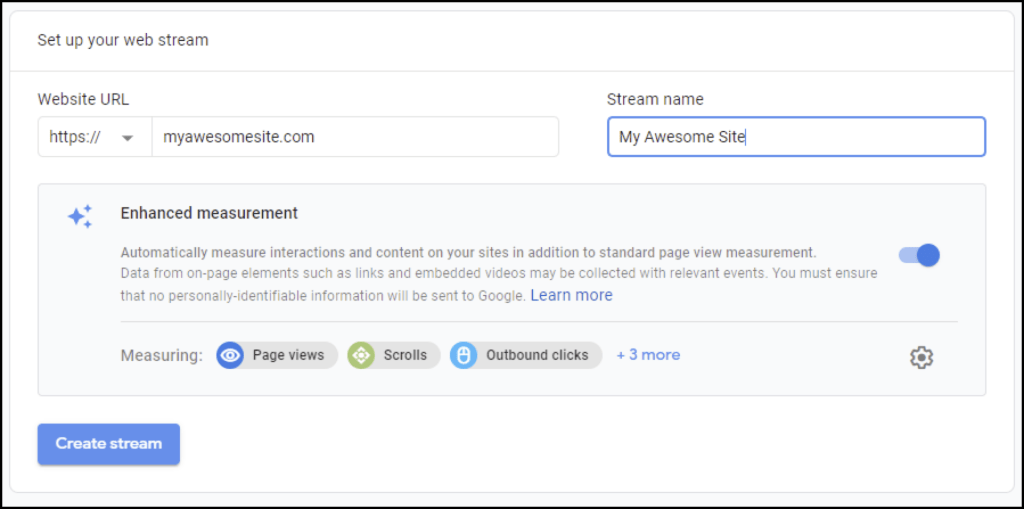
- You will then be presented with this screen asking you to choose a property. Choose Web and insert your website’s domain. Select https:// and enter the website name in the Stream Name box and click Create Stream.
- You will then be presented with this screen that provides you with your Measurement ID.
- In wp-admin go to
Jetpack → Settings → Traffic. - In the Google panel add the Google Analytics Measurement ID and click the Save settings button.
How to delete a site in Pressable and DeployHQ
- Start by disconnecting Jetpack before deleting a site.
- Log into our team’s Pressable account.
- Search for the site you want to delete and select it.
NOTE: Be sure to triple-check which site you are deleting, you do not want to accidentally delete a Production site. - Scroll to the bottom of the page and click on the
Deletebutton.
When deleting a site in Pressable you must also delete it in DeployHQ
- Log into the team’s DeployHQ account.
- Click on Projects in the nav and search for your site. Click on the site’s name to view the details.
- In the left menu click on the Servers & Groups tab. You’ll see our Development and Production sites listed.
- Delete the appropriate site.
How to retrieve assets accidentally permanently deleted
- In wp-admin of the site go to Jetpack → Backup and click the Download backup button.
- On the next screen make sure all of the check-boxes are selected and click on the Create downloadable file button
Note: while in a Support Session you will not be able to download the backup file. Jetpack will send an email to ███████████████ with a link to download the backup. Depending on the amount of content/data it may take some time to receive the email. - Once you download the .tar file you can browse through the directory structure to access images and content needed.
How to duplicate a WordPress.com Business Site
Detailed steps for duplicating a WordPress.com Business Site can be found ███████████████.
Tools to help purge DNS cache for faster Internet propagation
The three big public resolvers Google, Cloudflare, and OpenDNS have tools to purge DNS cache for domains.
