As part of the WordPress Data Liberation project, the Automattic Special Projects team recently released a WordPress plugin and Chrome extension that enables publishers and content creators to write content in WordPress and send their content to Substack. This new tool helps establish your WordPress website as the central hub and source of truth for your content.
The WordPress: Send to Substack tool allows you to populate content in a new Substack post from a WordPress post, right from inside the block editor. The tool consists of a WordPress plugin that works in tandem with our companion Chrome extension.
Technical Overview
Substack does not provide a public API for either writing or reading content. While some unofficial API’s exist for reading content, our initial investigation found no existing ways to programmatically “send” content to Substack to create a new Substack post. Our only option was via browser manipulation, ie. simulating a user for most element insertions. Unfortunately, this means it works now, but if Substack changes their interface or page structure, it could break things.
General Process Flow
- When “pushed”, the WordPress plugin parses the post content to make the markup more Substack friendly. This happens block by block so special cases can be handled.
- The content is put in browser storage and opens a new Substack post in a new tab.
- The Chrome extension gets to work “chunking” the content and adding it to the Substack post.
Challenges
This is a small subset of the challenges faced when sending content from the block editor in WordPress to Substack’s writing interface.
- Substack does not like most HTML. While inserting something like
<p>This is <strong>bold</strong> text.</p>into the Substack editor works, many other common tags are stripped out. In order to preserve content, we parse the blocks early to remove the troublesome tags. - We have more (and way cooler) blocks! Substack has a limited set of elements – which makes sense as it’s very email centric. We had to consider the most popular/likely blocks used in posts and re-format these during the initial parse so they would insert nicely and look something like the original. The Details block and Pull quote blocks are some examples that come to mind.
- Videos and Galleries. These didn’t paste well, at all. We ended up brute-forcing browser manipulation to simulate a new block and file uploading.
- Images were slightly easier, but these needed to be converted to base64 prior to inserting.
- Losing focus. Some elements hogged screen focus, or focus was wrongly placed, causing elements to get inserted in the wrong order. Nested lists required some special handling, as did gallery insertions – very stubborn! What worked for regaining focus after an element was inserted, didn’t work for another.
- Currently, this can only be used with Google Chrome.
What Works and Known Issues
Works
- Paragraph, Heading, Image, Separator, Buttons, File, Youtube embed, List, Code, and Gallery blocks (up to 9 images).
- Featured Image – added to the top of the post. The featured image block is ignored to avoid duplicates.
- Quote and Pullquote blocks. Both are converted to Substack “Block quotes”. Citations are added as styled text.
- Video Block – small issue where it gets added out of order. Working on a fix, but can be dragged back to position.
Known Issues
- HTML Block – Generally works but parses as text/content. Expect some tags to get stripped.
- Columns, Tables, Media & Text – There’s no option for these in Substack. The blocks are destructured and inserted as separated elements, such as text or images from each “cell”.
- Group, Cover Blocks – Similar to the above, but we try to capture all inner blocks and parse as regular content. We also attempt to import the background image if set.
- Code Block – This worked in a previous iteration. Working on a fix.
Unknowns
- Custom/3rd party blocks – How these are parsed will depend on the block mark-up. We try to clean-up the block markup to make it insertable, but as we discovered on this journey, most blocks require specific handling to get right. Results will vary from “worked great” to nothing at all. If the block relies heavily on attributes and php rendering, results will tend to be worse.
Using the Plugin and Chrome Extension
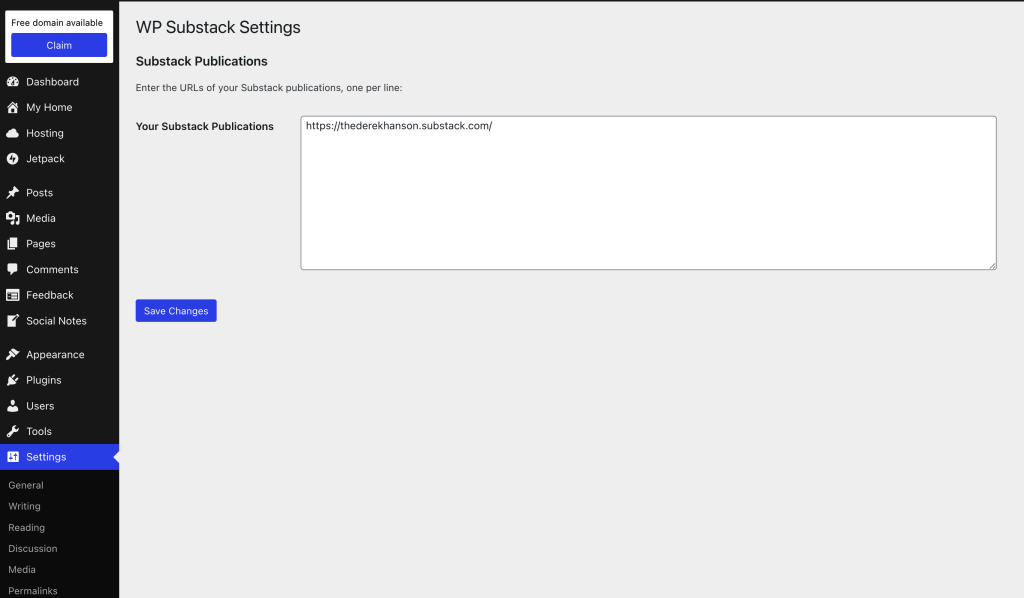
To get started writing for both WordPress and Substack, install the WordPress: Send to Substack plugin on your site. In the plugin’s settings, add your Substack publication(s) URL.
Install the Google Chrome extension following the steps in the plugin’s README files.
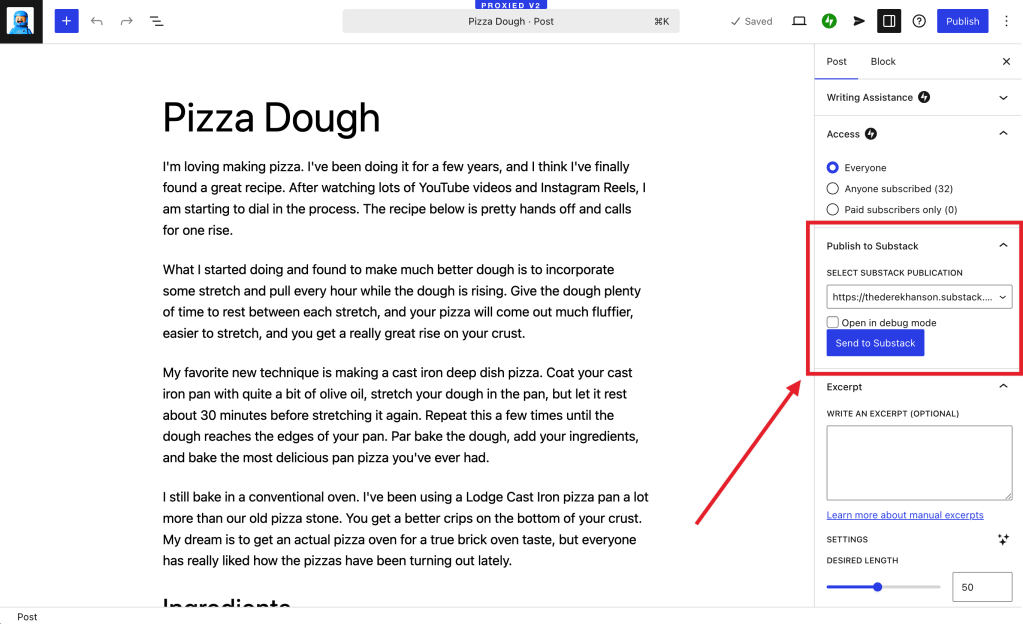
Write your post in WordPress, select your Substack publication, and click “Send to Substack.” The browser extension will open a new tab and magically paste all of your blog post content into a new Substack post. That’s it!
Amplify Your Content
If you are looking to grow your audience, Substack’s network and reader app can help creators gain subscribers. However, you can get locked into the ecosystem, and your publication will look like every other Substack. By leveraging WordPress as your primary source of truth and content hub, you can maintain control over your creative work while reaching a wider audience.
The WordPress: Send to Substack plugin simplifies the process of crossposting your content on Substack, amplifying your reach. As you expand your presence and grow your audience within Substack’s ecosystem, WordPress empowers you to cultivate your unique voice on the open web.
